The Basics of Growing Mushrooms


Use sawdust spawn and a brass inoculator.

Seal the holes with melted cheese wax.
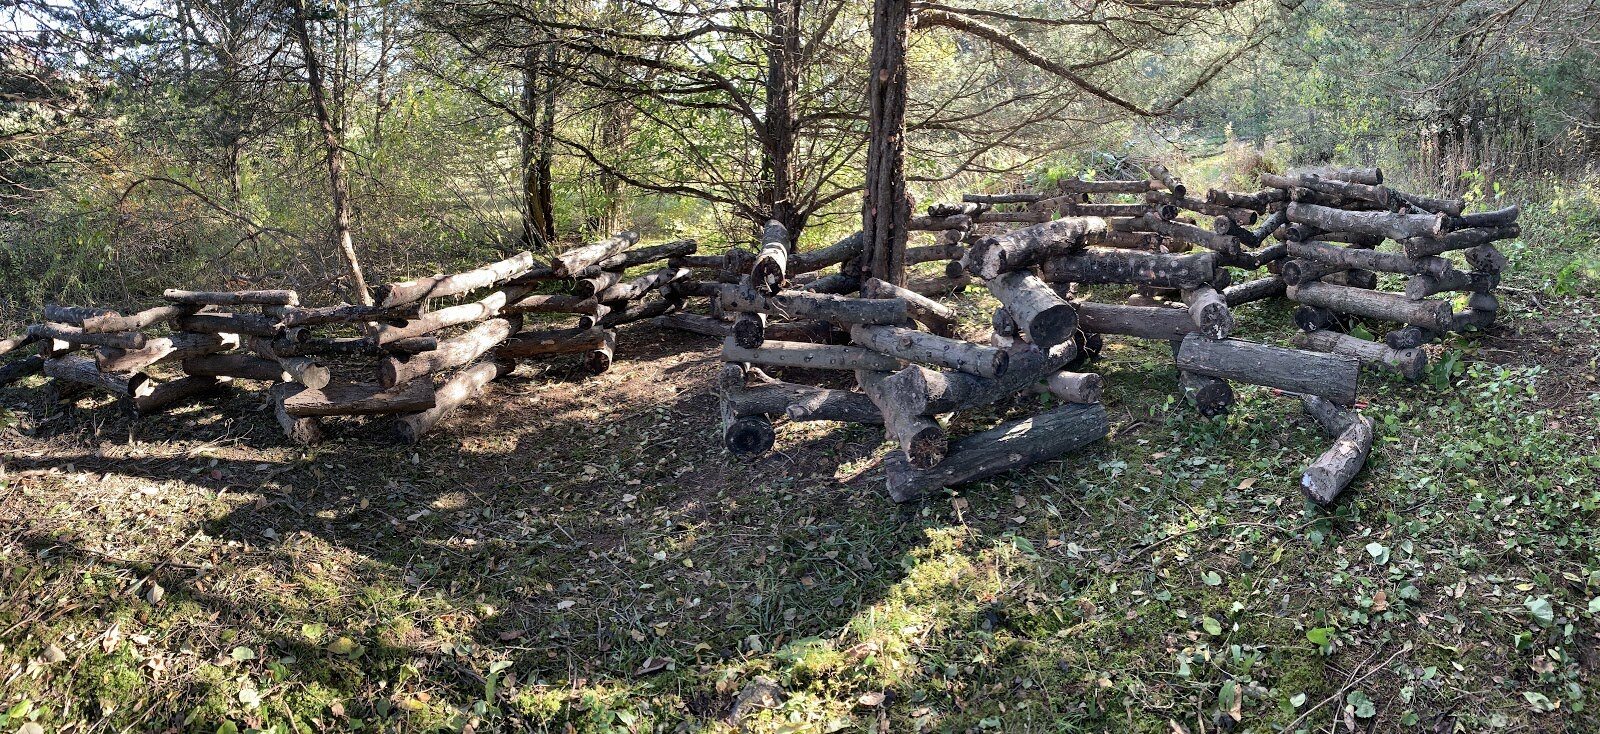
After inoculation, stack them in a dense cross-hatched pile in the shade.
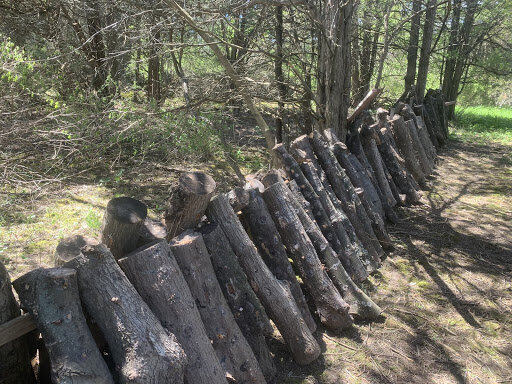
The following year, stack the logs for natural fruiting.

Shiitake harvest.
Growing mushrooms is a multi-year journey. We have been inoculating mushroom logs on the farm for the past three springs and last fall we began to see the fruits of our labor. Cultivating mushrooms on logs is a slow process (it takes about a year and a half to two years from inoculation to the first fruit) but if the logs are kept in a damp and shaded spot, they can produce mushrooms for over 5 years.
We start by cutting our logs in winter, when the trees are dormant and their living tissue doesn’t have as many active anti-fungal defenses. It is best to harvest full trees that have a DHB (diameter at breast height) of 8-12”. You can also the upper branches of larger trees that were harvested for timber.
Tip: Try to avoid using dead trees as it will already be colonized by undesirable fungi.
Due to our own tree availability, we use oak and ironwood for shiitakes and poplar wood for oyster mushrooms, (click here for a complete list of compatible woods to see what wood might work best for you). We cut the logs into roughly 3’ long sections and stack them carefully, trying to keep as much of the bark intact as possible. This is important because the bark protects the wood from being colonized by competing fungi. We then let the wood cure for at least three weeks, in a shaded spot where it will stay moist, before inoculating the logs once the weather start to get warmer (usually April - early May for us).
To inoculate the logs we use a few specific tools that we purchase from Field and Forest Products along with their mushroom spawn. We use sawdust spawn instead of dowel plugs because in the long run it is less expensive and more sanitary, even though you need a few more tools to get started. The spawn comes in five pound solid white mass bricks. These bricks are the young mycelium, or vegetative growth of the fungi. When you open the bag, it smells like you’ve been rolling around on the forest floor.
This dense collection of mycelium was started from mushroom spores on sterilized sawdust and allowed to grow for a couple months to completely colonize the brick and ensure that your mushroom species is the only one present. At this young stage, the sawdust and the mycelium growing on it can withstand being broken apart and will regrow very quickly if placed in a new medium, like a freshly drilled log.
To prepare the logs we drill a series of holes using Field and Forest’s specialty drill bit that matches the size of their inoculators. We drill in lines down the log at 6” spacing and drill offset lines every 2” around the log, this creates a diamond pattern with a length of 6” and a width of 4”. We then fill the holes with Field and Forest’s brass inoculator and finally we seal the holes with melted cheese wax, which you can get from Field and Forest along with their handy wax dippers that are more efficient than a paint brush. You will also need a small hot plate and aluminum cup to melt the wax outside. The wax should melt in the cup but not be hot enough to start smoking. It should harden on the log in about 5 seconds and turn to a fairly clear color. If the wax hardens white, it is not hot enough. We wax over the holes to hold in moisture for the fungi and prevent other fungi from competing for the wood.
Once our logs are inoculated, we stack them in a dense cross-hatched pile in the shade. If it is an especially dry summer, we occasionally water the logs to keep the wood wet for the fungi. After a complete year from inoculation, that fall we will either stack the logs for natural fruiting, where we monitor for budding mushrooms after a large rain event, or we start shocking the logs by soaking them for 24 hours then stacking them in an A-frame to force fruiting.
Those are the basics of our mushroom growing method. For more technical information, we recommend this UVM Extension article. Hopefully next spring we will be able to offer an on farm inoculation workshop where you can participate in the process and go home with your own mushroom log. In the meantime, keep an eye out for our fresh shiitake and oyster mushrooms on our online store and as ingredients featured in our kitchen’s deli menu.